前回の続きです。
TabBarの中に、サンプルコード"SQLiteBooks"を埋め込んだ手順をまとめてます。
(4) やったこと(後編)
(4-1) Xcodeで作業します。SQLiteBooksからコピーしてきたコードに手を加えます。まずはAppDelegate.hから。プロジェクトに元々あったHogehogeAppDelegate
を使用するよりソースコードの編集量が少なくて済むのでこちらを使います。ハイライトしている部分が編集した部分で、コメントアウトされているのが変更前です。
UIApplicationDelegateプロトコルとUITabBarControllerDelegateプロトコルに従います。もとのAppDelegateがなぜにUIApplicationDelegateに準拠してないのかは謎。他の変更はもとのソースがNavigationControllerを持っているのをTabBarControllerに変えるのに伴ったものです。実に簡単な変更です。
#import <UIKit/UIKit.h>
// This includes the header for the SQLite library.
#import <sqlite3.h>
// Inform the compiler that the following classes are defined in the project:
@class Book, MasterViewController, DetailViewController, AddViewController, EditingViewController;
//@interface AppDelegate : NSObject {
@interface AppDelegate : NSObject <UIApplicationDelegate, UITabBarControllerDelegate> {
IBOutlet UIWindow *window;
//IBOutlet UINavigationController *navigationController;
IBOutlet UITabBarController *tabBarController;
NSMutableArray *books;
// Opaque reference to the SQLite database.
sqlite3 *database;
}
@property (nonatomic, retain) UIWindow *window;
//@property (nonatomic, retain) UINavigationController *navigationController;
@property (nonatomic, retain) IBOutlet UITabBarController *tabBarController;
// Makes the main array of book objects available to other objects in the application.
@property (nonatomic, retain) NSMutableArray *books;
// Removes a book from the array of books, and also deletes it from the database. There is no undo.
– (IBAction)removeBook:(Book *)book;
// Creates a new book object with default data.
– (void)addBook:(Book *)book;
@end
(4-2) 次はAppDelegate.m。長いソースですが変更箇所はわずかです。ここもTabBarControllerに絡む変更のみ。
#import "AppDelegate.h"
#import "MasterViewController.h"
#import "DetailViewController.h"
#import "AddViewController.h"
#import "EditingViewController.h"
#import "Book.h"
// Private interface for AppDelegate – internal only methods.
@interface AppDelegate (Private)
– (void)createEditableCopyOfDatabaseIfNeeded;
– (void)initializeDatabase;
@end
@implementation AppDelegate
// Instruct the compiler to create accessor methods for the property. It will use the internal
// variable with the same name for storage.
//@synthesize books, window, navigationController;
@synthesize books, window, tabBarController;
– (void)applicationDidFinishLaunching:(UIApplication *)application {
// The application ships with a default database in its bundle. If anything in the application
// bundle is altered, the code sign will fail. We want the database to be editable by users,
// so we need to create a copy of it in the application's Documents directory.
[self createEditableCopyOfDatabaseIfNeeded];
// Call internal method to initialize database connection
[self initializeDatabase];
// Add the navigation controller's view to the window
//[window addSubview:navigationController.view];
[window addSubview:tabBarController.view];
[window makeKeyAndVisible];
}
– (void)applicationDidReceiveMemoryWarning:(UIApplication *)application {
// "dehydrate" all data objects – flushes changes back to the database, removes objects from memory
[books makeObjectsPerformSelector:@selector(dehydrate)];
}
– (void)dealloc {
//[navigationController release];
[tabBarController release];
[window release];
[books release];
[super dealloc];
}
(中略)
@end
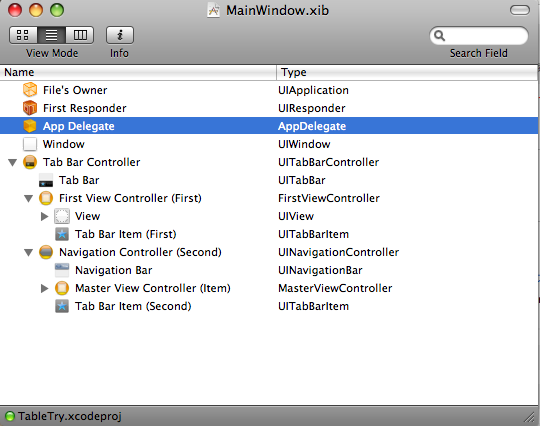
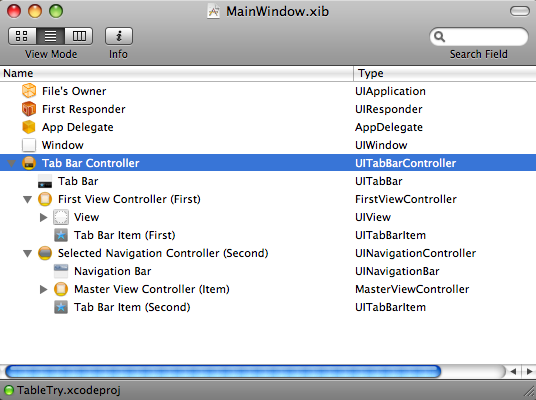
(4-3) 次にもうひとつだけInterface Builderで作業をします。ApplicationDelegateになるクラスをもともとプロジェクト作成時にデフォルトで生成されていたクラスからAppDelegateクラスに変更したので、それを教えてあげなければなりません。本当は昨日加えた変更とまとめてやってしまって良いのですが、昨日書くのを忘れていたのでここで書きます(汗)。まぁ、今日関連する作業をXcodeでやった後なので、あながち悪くないのですが。
<fig. 5>
(4-4) 最後にビルドですが、もうひとつ、SQLiteを使用するには専用のフレームワークを読み込まなければなりません。グループとファイルの下のFrameworksを右クリックして”追加”から”既存のフレームワーク”を選び、数あるフレームワークの中から、libsqlite3.0.dylibを追加します。
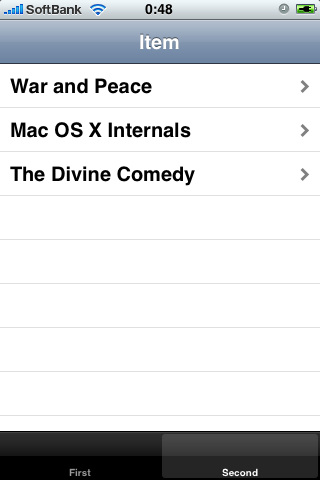
(4-5) ビルドして実行!で完成です。わたしは実機にインストールしてます。実機だと達成感があります。
<fig. 6>
(5) 最後に
今日、なにげにもう一度なにも見ずに最初からやってみましたが、またひっかかりました。ひっかかりやすいポイントをあげるならば以下の3点でしょうか。
- NavigationViewController.xibでFile's OwnerにTable Viewを接続し忘れる
- ApplicationDelegateをMainWindow.xibで古いままにしている(今回追記したポイントw)
- libsqlite3.0.dylibフレームワークを追加し忘れている
3つ目はコンパイル時にエラーが出るのでわかりますが、上2つはでません。アプリの動作が止まっ
たらコンソールで確認するとヒントがでてます。
以上!
<<免責事項>>
ここに紹介した方法を参考にしてアプリケーション開発を行ったことで発生しうる如何なる問題についても、当ブログ管理者は一切責任を負いません。
